Up for something new today and wanted to explore some extraordinary sports? Why not try finger boarding now? It takes years of practice and dedication with a great deal of patience and endurance to master it.
When you have a fingerboard, you can immediately begin practicing tricks. But how to do fingerboard tricks for beginners? When you’ve just started learning the game, and you’re at the beginning stage?
While many people fingerboard for fun, there are a few pros that do it for a living as a vocation. The reason why they’re so good at fingerboarding is the amount of practice they put into it. To get to their level, you also have the same route to follow, but in a mannered way.
And today, we’re talking about those tricks and manners you’ll have to follow to match their level of proficiency.
Is Fingerboarding Easy For Beginners?
Regrettably, it is one of those sports that appears to be much easier than it is. If you’re purchasing a fingerboard with the expectation of doing easy tricks and impressing your friends, prepare to be disappointed.

Some have even stated that it is more difficult than skating, although this is highly improbable. That is true if you have expertise in board sports but have never used a fingerboard, but for the typical person new to both sports, fingerboarding should be simpler.
However, that is not to suggest that you should abandon your training and stop daydreaming about your incredible play. Fingerboards are a simple and affordable way to experiment with techniques and learn the ideas that underpin them while having a good time. As with any sport or activity, practice is critical.
How To Do Fingerboard Tricks For Beginners?
If you’re new to Fingerboarding, there are three basic techniques you’ll need to master before progressing to more difficult tricks on a Fingerboard. Before we begin the tricks for the journey of fingerboarding, let’s take a look at the fingerboards you should have as a beginner to start your fingerboarding tricks.
If you’re new to Fingerboarding or have been for a short period of time, there are several excellent highly durable fingerboards. Get one of the durable ones that won’t break the budget but will last you for years while withstanding heavy usage.
Tech decks
Tech decks are an excellent starter board, but you should upgrade as quickly as feasible.

Have authentic skateboard brands, which adds to the authenticity.[/i2pros][i2cons]Plastic decks eliminate part of the pop
plastic wheels are unsteady and quickly break;
and plastic trucks are brittle and readily shatter (i broke about 3 of my 6 Techdeck trucks when just starting out)[/i2cons][/i2pc]
P-rep Complete 30mm Fingerboard
This is the fingerboard that I would suggest to both beginners and advanced fingerboarders. I’ve experimented with more costly boards and this remains my favorite. The P-Rep Red Complete Wooden Fingerboard is what it’s called.
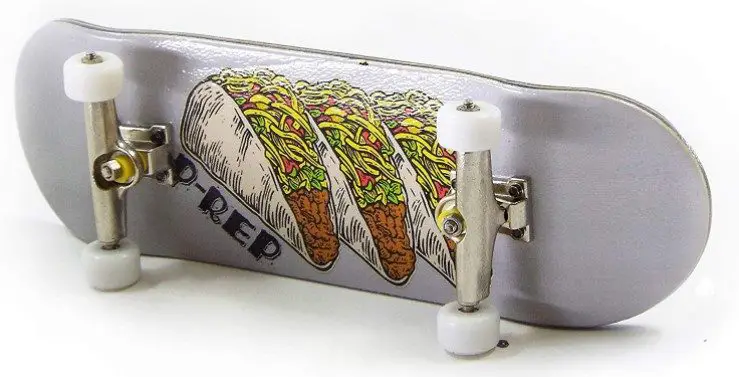
Foam grip tape is a significant improvement over Techdeck’s sand paper. It’s quite difficult to return.
The wood deck allows for a greater number of pop bearing wheels, which results in a significantly smoother ride.[/i2pros][i2cons]Bearing wheels can get blocked and unusable if not cleaned and maintained correctly.
The wheels are made of plastic and have a low grip.[/i2cons][/i2pc]
P-Rep Fingerprint 30mm Graphic Complete Wooden
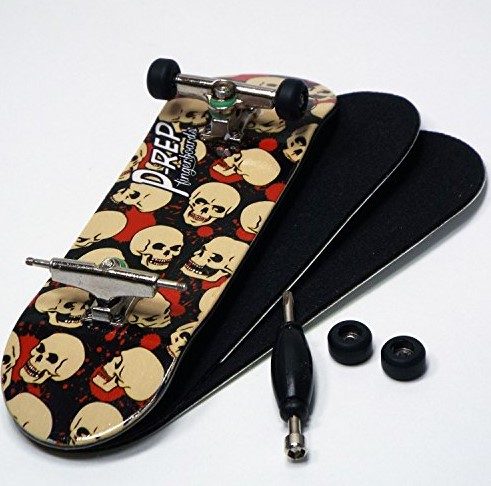
The bottom graphic enhances the appearance of the Fingerboard.[/i2pros][i2cons]Although more expensive than the original fingerboard, it is still rather affordable in comparison to other boards.
You may not be as fond of low mold as others.[/i2cons][/i2pc]
Now that you have selected your fingerboard let’s go on to the tricks that will help you start this sport…
Doing Shuvit/ Pop shuvit
In order to do the pop shove on a fingerboard, one scoops while popping the tail and drawing up the front finger. Let the board continue spinning before catching it to halt it. A pop shove is commonly characterized as a backside 180 turn of the board, although there are different variants. 360° pop shoves and frontside pop shoves are examples.
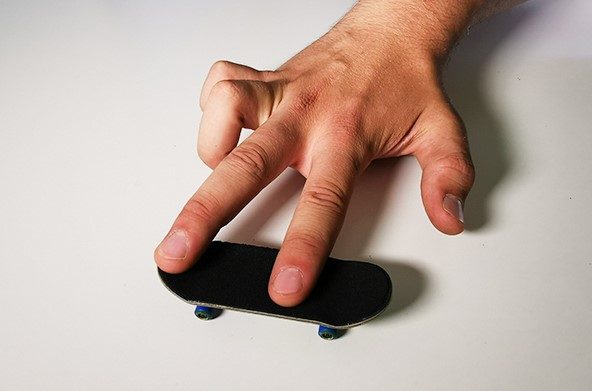
Step 1: Finger Positioning
The pop shove-it has a different finger location than the shove-it. The difference lies in the index finger position. Place it over or near the front bolts instead of in the deck’s center. Keep your thumb above the tail’s tip.
Step 2: Do the spin
Use your back finger to start the board’s spin, much like an Ollie.
Step 3: Leveling Out.
Due to your stronger pop, you must level the board with your front finger. Normally, you’d slip your front finger out of the way. However, on a pop shove it, let the board’s nose catch your front finger. This will level the tail.
Step 4: Catching the Board
Keep an eye on the board’s rotation and leveling. With experience, the board will level itself immediately before spinning 180 degrees. Catch it with your fingertips and trample it now.
Video attached for a better understanding of how does it really execute:
Ollie
The Ollie is a crucial fingerboarding maneuver to learn. A solid pop is achieved by pressing the tail with the back finger, then flicking the wrist upwards, pushing the front finger towards the nose to level the board in the air. To achieve an equal landing, both fingers must be pressed consistently while falling.

Step 1. Finger between the nose and the center of the board, middle finger on the tail for pop.
Step 2. Popping the Tail: Press firmly on the tail with your back finger to cause the board to become upright.
Step 3. Sliding the index finger upwards towards the nose causes the board to rise seeking air. Instead of merely using the index finger, focus on moving the entire hand and wrist to allow the board to air.
Step 4. Leveling the board in the air: Turn your wrist horizontally while manipulating the board’s tail with your middle finger.
Step 5. Landing: Apply equal pressure with both fingers as the board descends.
Video attached for better understanding on how does it really executes:
Kickflip
The kickflip is one of the most popular fingerboarding moves to master and one of the most sought-after skills to learn. You should be able to land an ollie and a shove it before learning how to kickflip a fingerboard.
While the kickflip is a popular technique, it is not easy to master and will demand practice. Follow the steps below to learn how to kickflip a fingerboard:
Step 1: Place your fingers.
Place your rear (or middle) finger on the tail of the board and your front (or pointer) finger slightly beneath the board’s four front screws that secure it to the trucks.
Step 2: Tap the board
Roll the fingerboard forward and press the tail of the board down with your back finger, causing the board to fly off the surface.
Step 3: Turning the board over
Slide your front finger towards the nose of the board closest to you, slightly flicking your finger down as your finger reaches the nose, causing the board to begin flipping toward you as it pops off the surface.
Step 4: Performing the trick
As the board spins, keep your fingers above it. With your fingertips on the top grip side of the board, catch the board just before it completes one full rotation and land the trick with both fingers on the board.
Video attached for better understanding on how does it really executes:
Frequently Asked Questions (FAQs)
Consider the above steps to be building bricks. You want to ensure that you have a firm grasp on each stage before moving on to the next. But before that here are some Frequently asked questions about fingerboarding that might help you understand more about it.
What is the point of fingerboarding?
Fingerboards are utilized by a diverse spectrum of individuals, from children to pros in skateboarding and associated sports who visualize not just their own skating movements but also those of others. They can also be used to plan out competition courses as skateboarding becomes an international sport.
How many times a week should your fingerboard?
It is recommended that you limit your intensive fingerboard training to two days per week—or three days at the most if you do not do any other climbing—and that you utilize it as a supplement to your climbing rather than as a replacement for it.
Conclusion
Fingerboarding is more than a pastime. This is a game that many admire. It is referred to by some as a way of life. Some refer to it as a way of life. Whatever perspective you take on fingerboarding, it’s a lot of fun.
They were originally intended to be cool designer keychains for skateboard enthusiasts, but they have already taken the world of skating by storm. In some way! Now that you know how to do fingerboard tricks for beginners, you may perform the same maneuvers as conventional skateboarders but in a safer (and possibly even better) way.